What a Dish Drying Rack Really Does (and Why You Should Care More Than You Think)
You already know why a drying rack is needed if you’ve ever put freshly cleaned plates on a towel and hoped they wouldn’t slip.
But what does it really do, and why is it one of the least used appliances in your kitchen?
Hello, My name is Jannatul Ferdaus, and after years of studying home goods (and accidentally flooding my counter a few times), I’ve come to appreciate how beautiful a well-designed rack can be. This system is easy to use and does more than just hold clean silverware; it also keeps your kitchen neat, organized, and even a little cleaner.
I’ll talk about everything I’ve learned today, like how to choose a rack that works for you and what makes them useful.


Recognizing the True Function of a Dish Drying Rack
In its most basic form, a rack provides a sanitized area for your cleaned utensils to rest and air dry. However, upon closer inspection, it reveals a whole micro-ecosystem of drainage and airflow.
Water naturally flows off your plates, glasses, and utensils without leaving smudges or residue because it keeps everything upright.
I became aware of how well-designed some of these tools are when I first began to pay attention to them.
A great rack does more than just store things; it also cleverly arranges them. Glasses are tilted for ventilation, plates are upright, and cutlery is kept apart to prevent contact (because, let’s be honest, soggy spoons are the worst).
The primary concept?
You avoid towel-drying every fork after dinner, save counter space, and stop mold from growing.
Various Drying Rack Types (and How to Choose Your Own)
These racks come in a wide variety of designs, and selecting the incorrect one can be frustrating. I’ve tested a number of designs over the years, and this is what I’ve discovered:
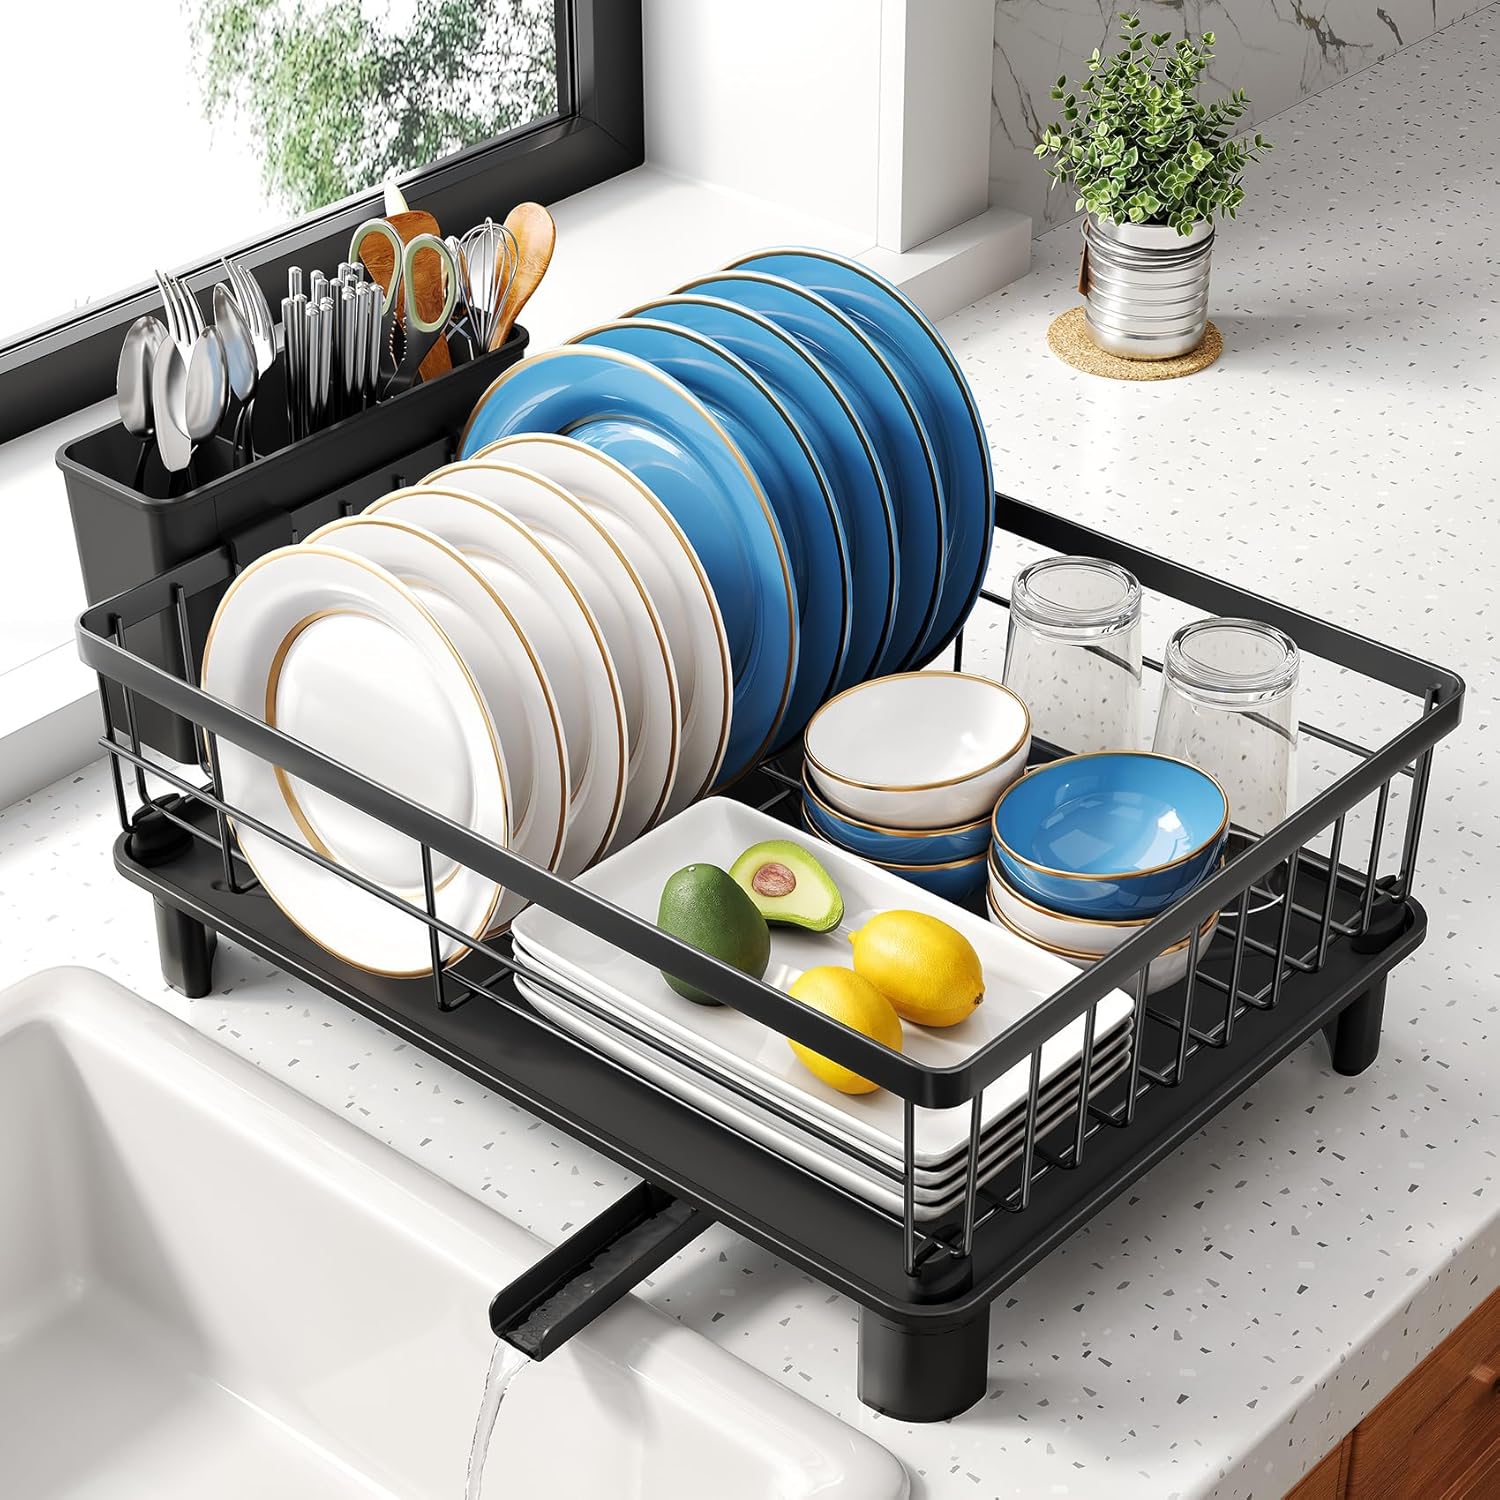
1. Countertop Designs
These are the standard full-sized models that are placed next to your sink. Plates, bowls, glasses, and silverware are typically divided into several sections.
They are ideal for people who enjoy cooking on a regular basis or for medium-sized to large households.
Advantages: Generally very stable, large capacity, and easy access.
Cons: Requires counter space.
Countertop models are the most practical and durable choice if your kitchen can support them.
2. Styles Over-the-Sink
These racks allow water to drain straight into your sink by resting across or above it.
Because they use vertical space rather than horizontal, I think these are especially effective in smaller kitchens, especially apartments.
A layer for plates, another for utensils, and a side for cutting boards are even included in some models. It’s a neat, small setup that dries quickly.
Expert advice: Before making a purchase, measure the width of your sink. Installation may be difficult if there are a few extra centimeters.
3. Compact and Foldable Choices
Foldable racks are a godsend for people like me who detest clutter.
They can be folded up and slid into a cabinet once you’re finished. These are perfect for sporadic cooking setups or small kitchens.
They make sense for renters who move around a lot or minimalists, even though they’re not as sturdy as metal ones.
4. Vertical or Wall-Mounted Units
A little less common, but very useful if you don’t have any counter space.
These racks, which frequently have detachable trays to catch any dripping water, can be installed next to your sink or dish area.
When paired with the appropriate kitchen design, they are both practical and fashionable.
5. Mats for drying dishes
These are more like absorbent pads for rapid drying than racks at all.
For those who want something portable or who wash a few things at a time, they’re an easy solution.
Just remember that because moisture can get trapped underneath, mats need to be cleaned and replaced on a regular basis.

Anything that comes out of the sink should be able to go on a rack, but this isn’t always the case.
What usually works best is as follows:
Bowls, cups, and plates
Tumblers and glasses (turn them upside down)
Ladles, cooking utensils, and knives with caution
Cutting boards, pots, and lids (based on rack size)
Steer clear of piling too many heavy objects on top. It can warp plastic trays and scratch your cookware in addition to obstructing airflow.
My experience has taught me to slow down and dry in batches if your rack resembles a Tetris game.
How to Pick the Best One for Your Kitchen
Functionality always wins out over aesthetics when choosing a good rack.
Before purchasing any new kitchen tool, I use the following checklist:
1. Compatibility with Space
The layout of your counter or sink is crucial.
Before making a purchase, measure the space you have available and remember to factor in faucet clearance.
2. Durability of Materials
The gold standard is stainless steel, which is long-lasting, easy to clean, and resistant to rust.
Although plastic versions are less expensive, they may eventually discolor or retain odors.
Look for coated metal or bamboo if you want a combination of strength and beauty.
3. Design of Drainage
This feature is crucial.
You can avoid untidy water puddles by using a rack with an intelligent drainage channel or spout.
I used to have a model that required me to manually wipe underneath it after each wash because it lacked drainage. A lesson was discovered.
4. Upkeep
Choose one with smooth corners or detachable parts. It keeps mold from growing and speeds up cleaning.
5. Consistency
Your day could be ruined by a shaky rack.
Look for solid base frames that don’t slip under heavy loads or rubberized feet.

In addition to being practical, a good rack inhibits the growth of bacteria.
Mold and bacteria thrive on moisture, which is trapped when damp utensils are stacked in a small area.
You can naturally reduce germs without the use of chemicals by letting your cookware air dry.
Dishes that have been air-dried also appear cleaner. Although towel drying may appear quicker, it may result in lint or streaks.
Consider your rack more than just a storage device; consider it an integral part of your kitchen’s health regimen.
My Top Picks for Drying Racks
Here are some choices that have earned a permanent place in my notes after years of testing, examining, and contrasting:
1. Full-Size Drying Rack from KitchenAid
This model has a sturdy, high-end feel. It doesn’t bend or wobble while supporting heavy dish loads.
The stainless steel body has excellent rust resistance, and the detachable mat drains effectively.
Although it does require some counter space, it is perfect for larger families.
2. Compact Steel Frame Rack by Simplehuman
One of my favorites for smaller kitchens. It drains straight into the sink, has a clever design, and the material is never weak.
The drip tray swivels, which is great for small spaces, and the high sides stop cups from slipping.
3. Tosca Rack from Yamazaki Home
This one is for minimalists.
It has a sleek appearance thanks to its simple design, wooden handles, and neutral color.
Although it isn’t designed for heavy loads, it’s a treasure if you value style and minimal use.
4. The Rubbermaid Drainer
Easy, useful, and reasonably priced.
Although it doesn’t pretend to be fancy, it is dependable, simple to maintain, and perfect for simple setups.
Advice for Maintaining a Clean and Odor-Free Rack
If you don’t clean your drying rack on a regular basis, it can become a hassle rather than an aid.
This is my basic maintenance schedule:
- Rinse every day to quickly remove crumbs and soap residue.
- Weekly deep cleaning: Warm, soapy water should be used to soak removable parts.
- Use vinegar to eradicate mold spores; it’s an excellent natural disinfectant.
- Dry entirely: Never put it back together while it’s wet.
Steer clear of bleach as it can damage finishes and corrode coatings.
Use baking soda, give it a quick scrub, and give it a good rinse if you see any buildup or water spots.
Avoid These Errors When Using a Rack
When used improperly, even good products can fail. Some errors I observe people making repeatedly are:
using an excessive number of heavy utensils.
not routinely emptying drain trays.
The rack should be kept close to a wall without any ventilation.
neglecting to clean the base tray.
I promise that you can extend the lifespan of your rack by investing 30 seconds in maintenance.
Additional Advice: Incorporate Some Style
Select a rack that matches the style of your kitchen if, like me, you enjoy neat environments.
For a cozier appearance, choose models with wooden accents or try matching the color of your countertop tools.
Although it may seem insignificant, a well-thought-out arrangement gives your kitchen a more deliberate and uncluttered appearance.
Concluding Remarks: A Little Instrument That Has a Big Impact
In addition to saving room, a well-designed dish drying system also saves time, minimizes mess, and maintains cleaner cookware.
It’s one of those kitchen heroes that, in my opinion, is frequently overlooked until you try living without it.
Pick one that doesn’t compete with your faucet for space, meets your needs, and drains effectively.
Finding a balance between form, function, and ease of cleaning is ultimately what matters.
Because another mess waiting to happen is the last thing you want after doing the dishes.
Purchasing the appropriate rack will benefit both your dishes and your sanity.


